|
TANKSLAPPER INSTALLATION
JANUARY 27, 2006 48 DEGREES F & RAINING I am very happy with the results!!!!!!! The images below link to larger versions that should give you a better idea of exactly where the film sits. Clicking on the larger version will return you to this page. You might want to read through my comments before starting. Of course you have read the instructions from TankSlapper! |
|||
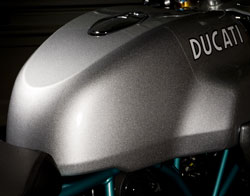
| TOP THREE IMAGES TAKEN UNDER 3200K LIGHTS 1200WATTS TOTAL TankSlapper kit for PS1000LE has four pieces. Two pieces are for the sides of the tank and cover the areas where your knees go and would contact the tank. There is a top piece that covers the "flat" between the gas filler cap and where the tank starts to curve down towards the seat. The last piece covers the curve on the back of the tank. This is on the part of the tank the impacts your crotch. Please note that TankSlapper does not imply that their product will in anyway offer protection to that area of your body in the event of rapid deceleration. |
|||
|
CLICK ON EACH IMAGE BELOW FOR LARGER VERSION.
LARGER VERSIONS LINK BACK TO THIS PAGE. |
|||
 |
 |
 |
||||||||
| The next image is of my 2003 Honda CBR1100xx Blackbird. Note the TankSlapper piece on the right side of the tank. That piece and its companion piece on the left side of the tank have been there for over two years. The other image is showing what I used to install the TankSlapper pieces. 2-600watt lights, heat gun (use only on low setting, instruction sheet, spray bottle with a 25% rubbing alchol to 75% water solution and a 3M hard squeegee (P.A.-1). I bought the squeegee from TankSlapper. "Click Here" to see how the "pros" modifiy their squeegees to enhance the performance. Wrap a narrow strip of - the fuzzy half "Velcro" around the tip of the squeegee blade, you'll have what TankSlapper considers to be the perfect installation tool. No more drag or scratching that the bare blade is capable of doing to the surface or the film. (BIG thanks to Lucas at TankSlapper) Also note that the squeegee (gold blade) is just like the blue blade I use but is made of a more material and cost about 5 times as much. If you are using the "Velcro" tip on your blade is makes no difference which blade you are using. Note the Since the ambient tempertature was 48 Degrees F I needed to keep the garage closed up and the lights were for both heat and illumination. The heat gun was a must for this low of a ambient temperature. In the past I have always tried to install TankSlapper material on a warm day. Above all else RTFM!!!!!!!!!!!!!!!!!!!!!!!! |
||||||||||
 |
||||||||||
 |
||||||||||
|
The images below were taken out of doors with heavy overcast skies.
|
||||||||||
 |
||||||||||
 |
 |
|||||||||
 |
||||||||||